AWS Free Tier RDS Database Setup
As part of the AWS Free Tier, the Amazon RDS Free Tier helps us get started with a managed database service in the cloud for free. There are two important things while setting up it: keep database storage and time usage under the free tier limit, and set up a network to connect to the database remotely(from your local machine).
This article focuses on creating an RDS database covered by AWS free tier, and remote connectivity will be covered in the next article.
AWS Free Tier Limit
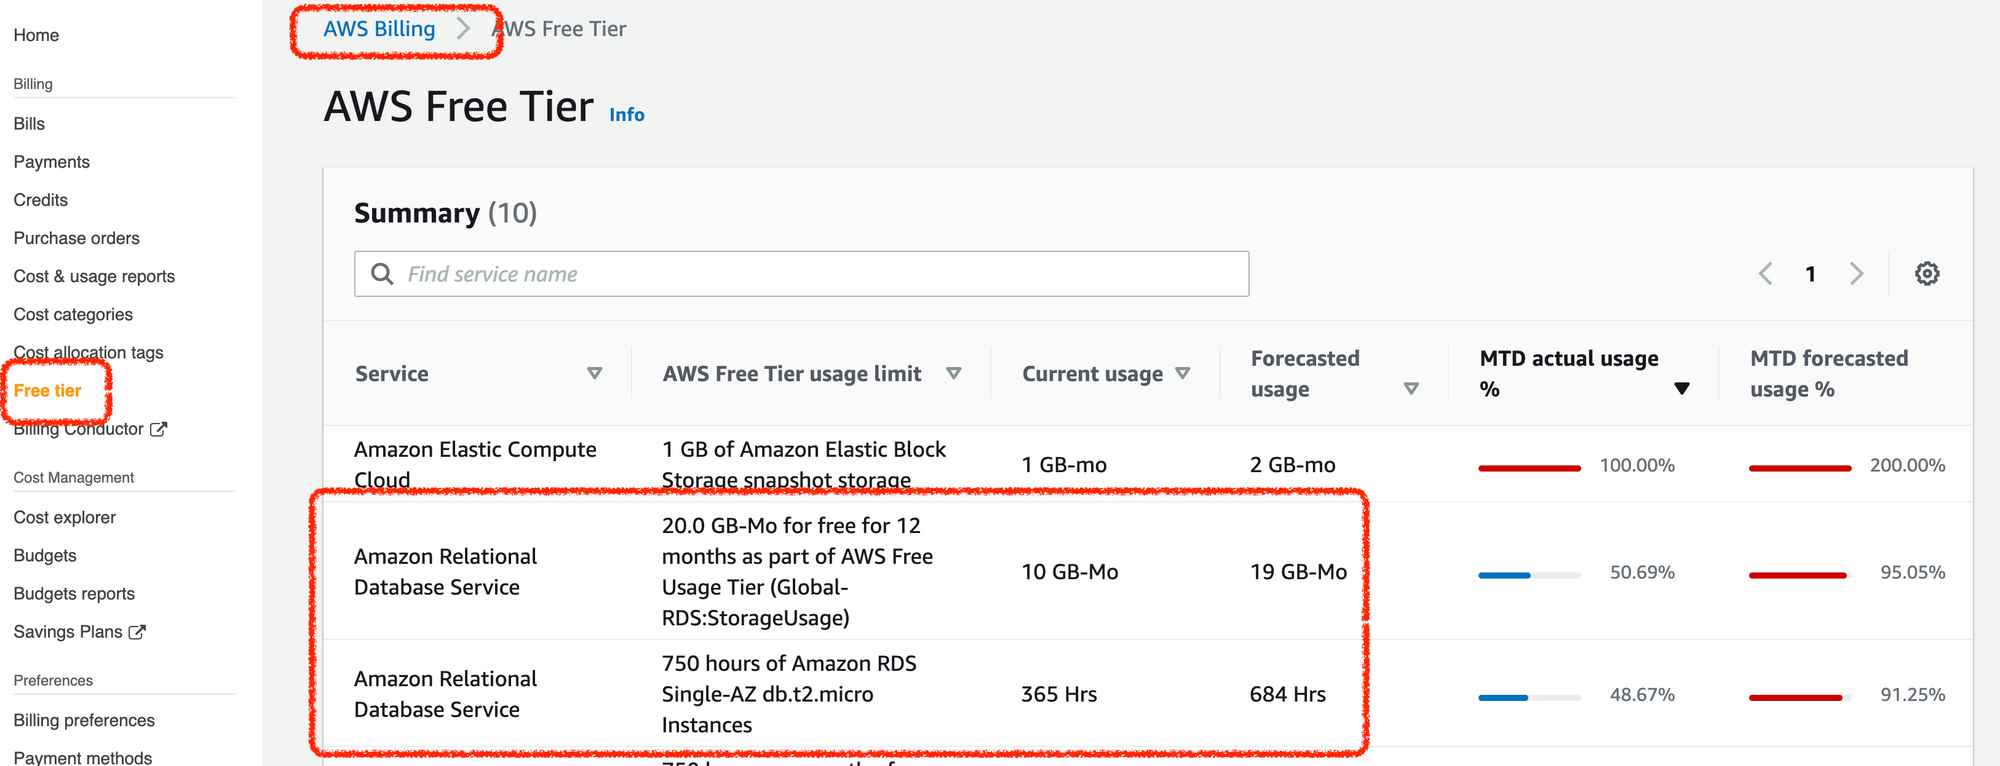
Keep the database's storage and usage time under free tier limit, otherwise you will be charged for extra use. Amazon free tier offers users 20.0 GB-Mo for free for 12 months for database storage, and 750 hours of Amazon RDS Single-AZ db.t2.micro Instances. You can check this for more info.
If you have an AWS free tier account, You can check AWS management console for detailed free tier usage info, at Billing => Free tier:
Create an AWS free tier database instance
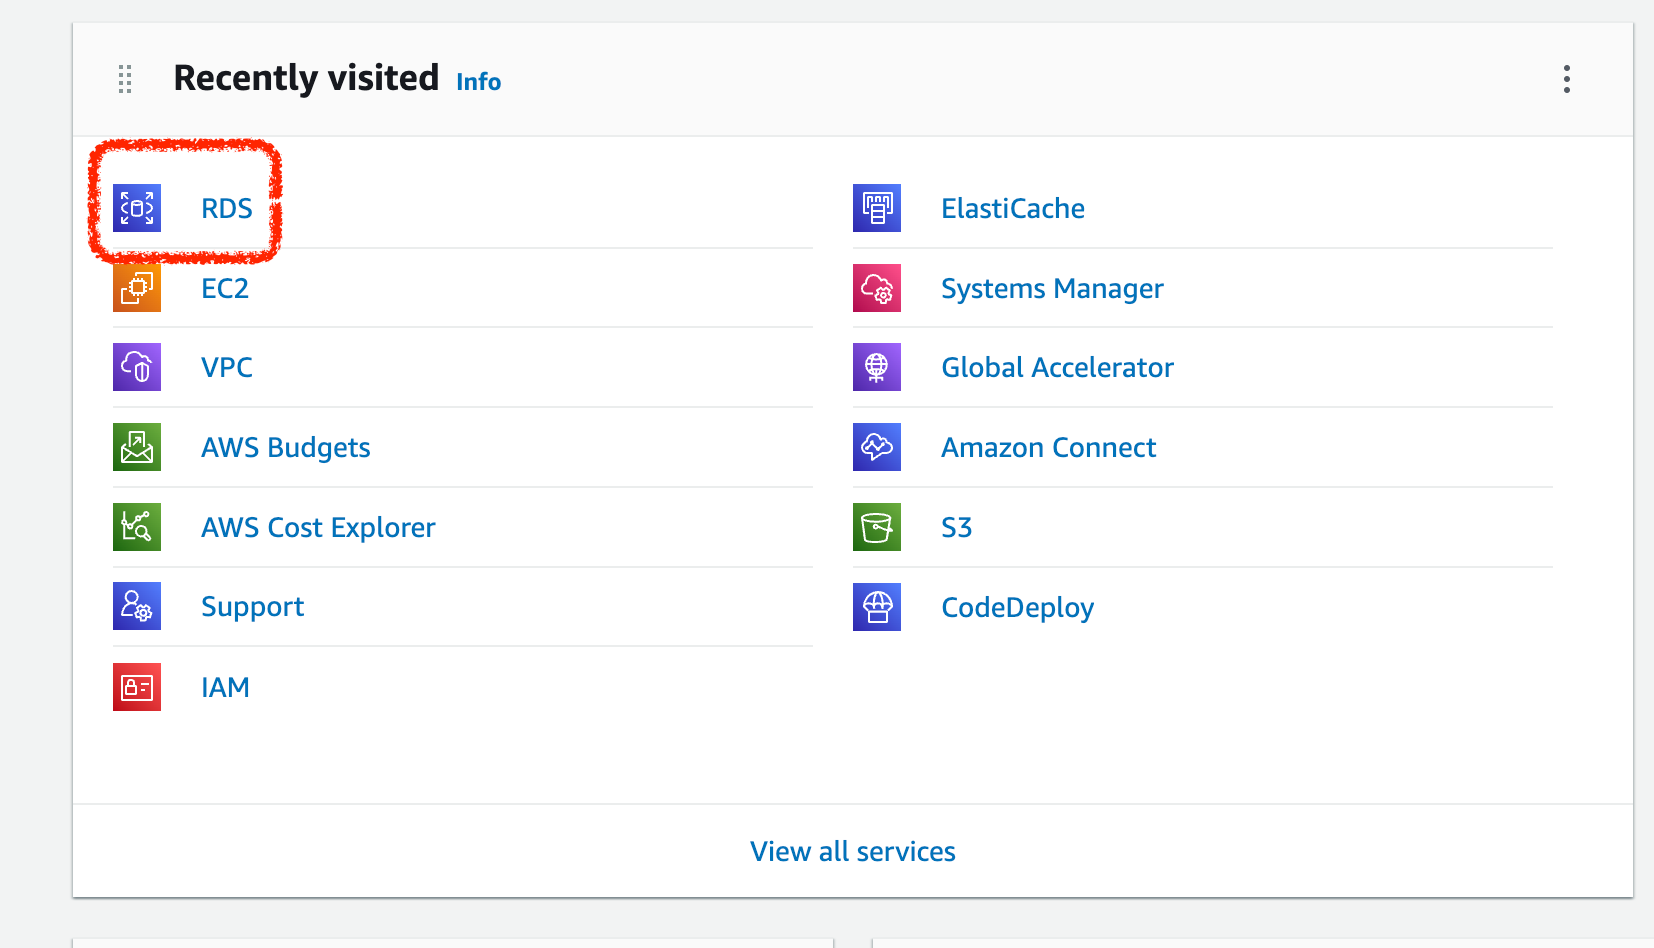
- Choose "RDS" in AWS management console, and choose "Create database"

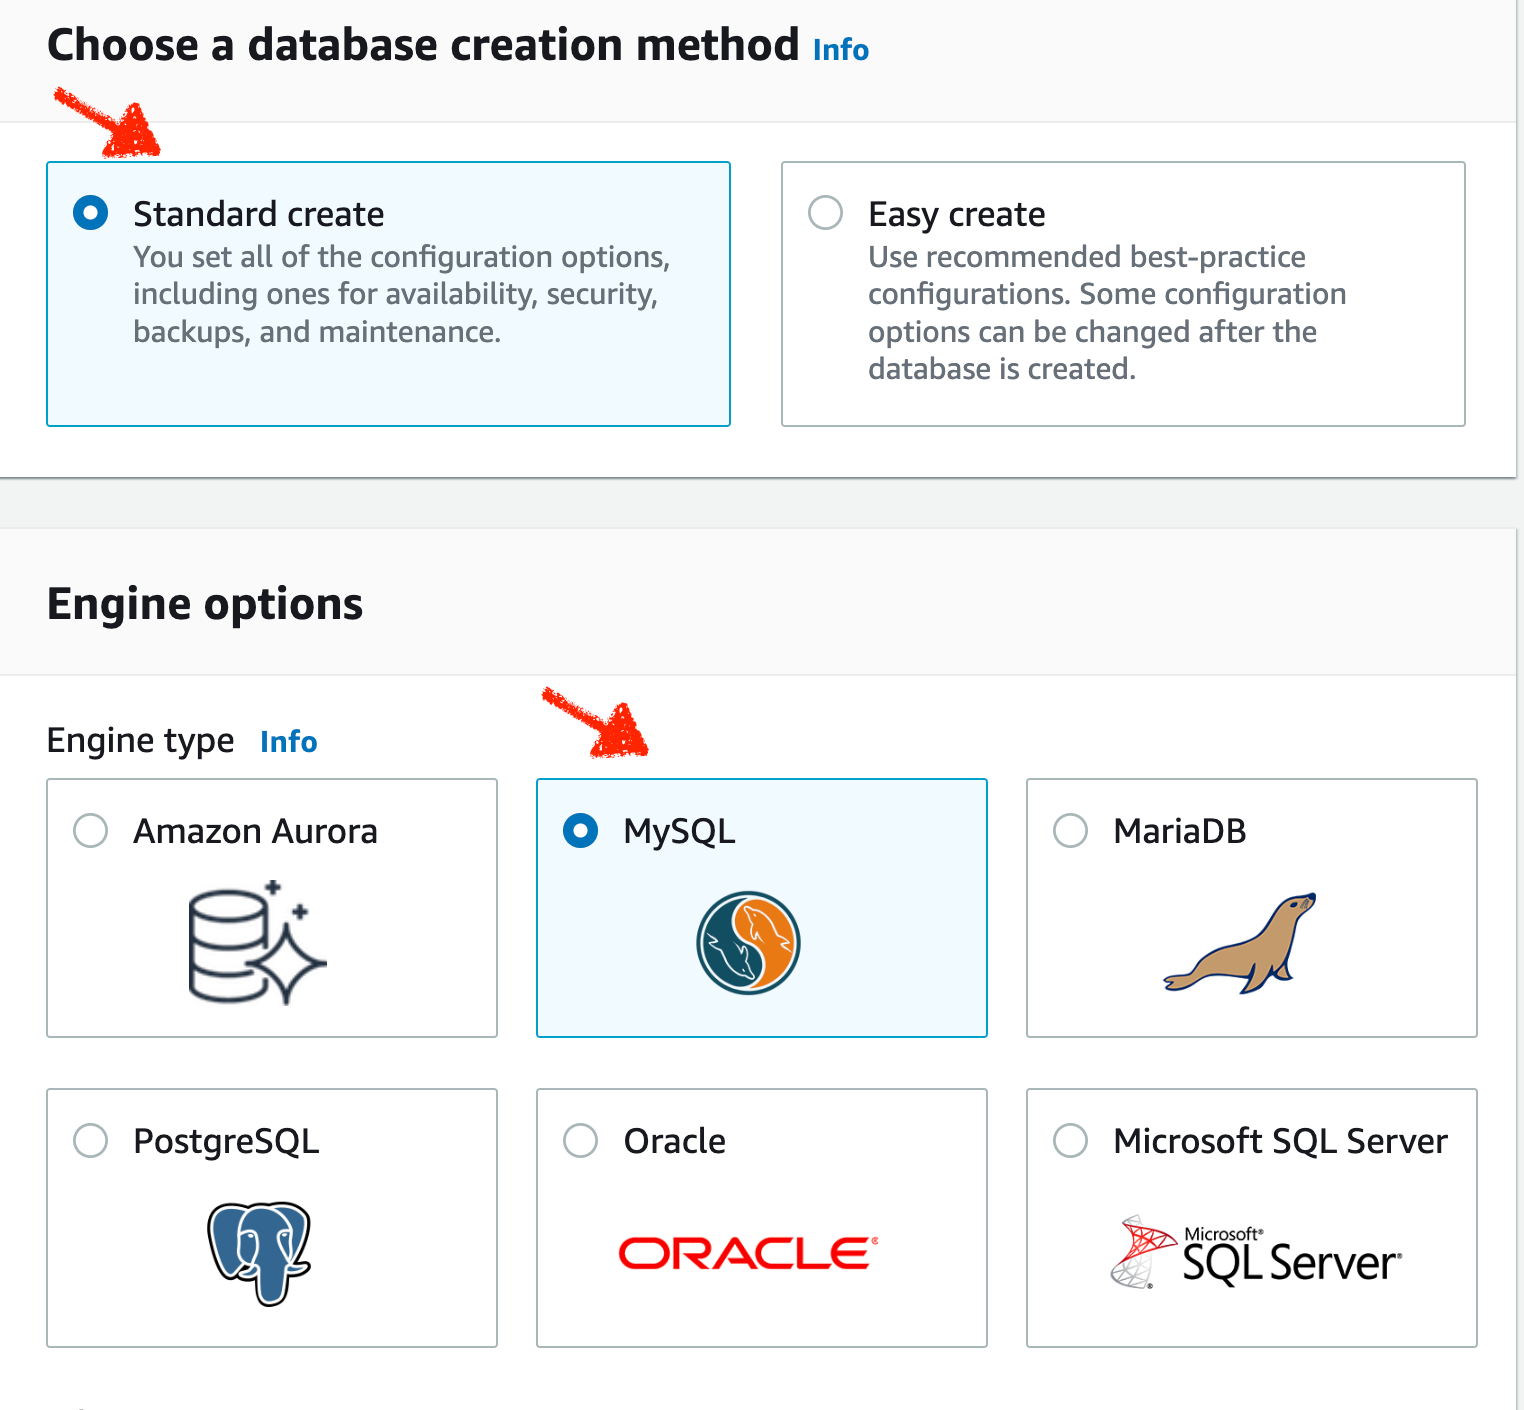
- For "Choose a database creation method", choose "Standard create"
- For "Engine options", choose "MySQL"
- ❗❗️For "Templates", choose "Free tier"
- For "Settings", you can choose the name and password you prefer
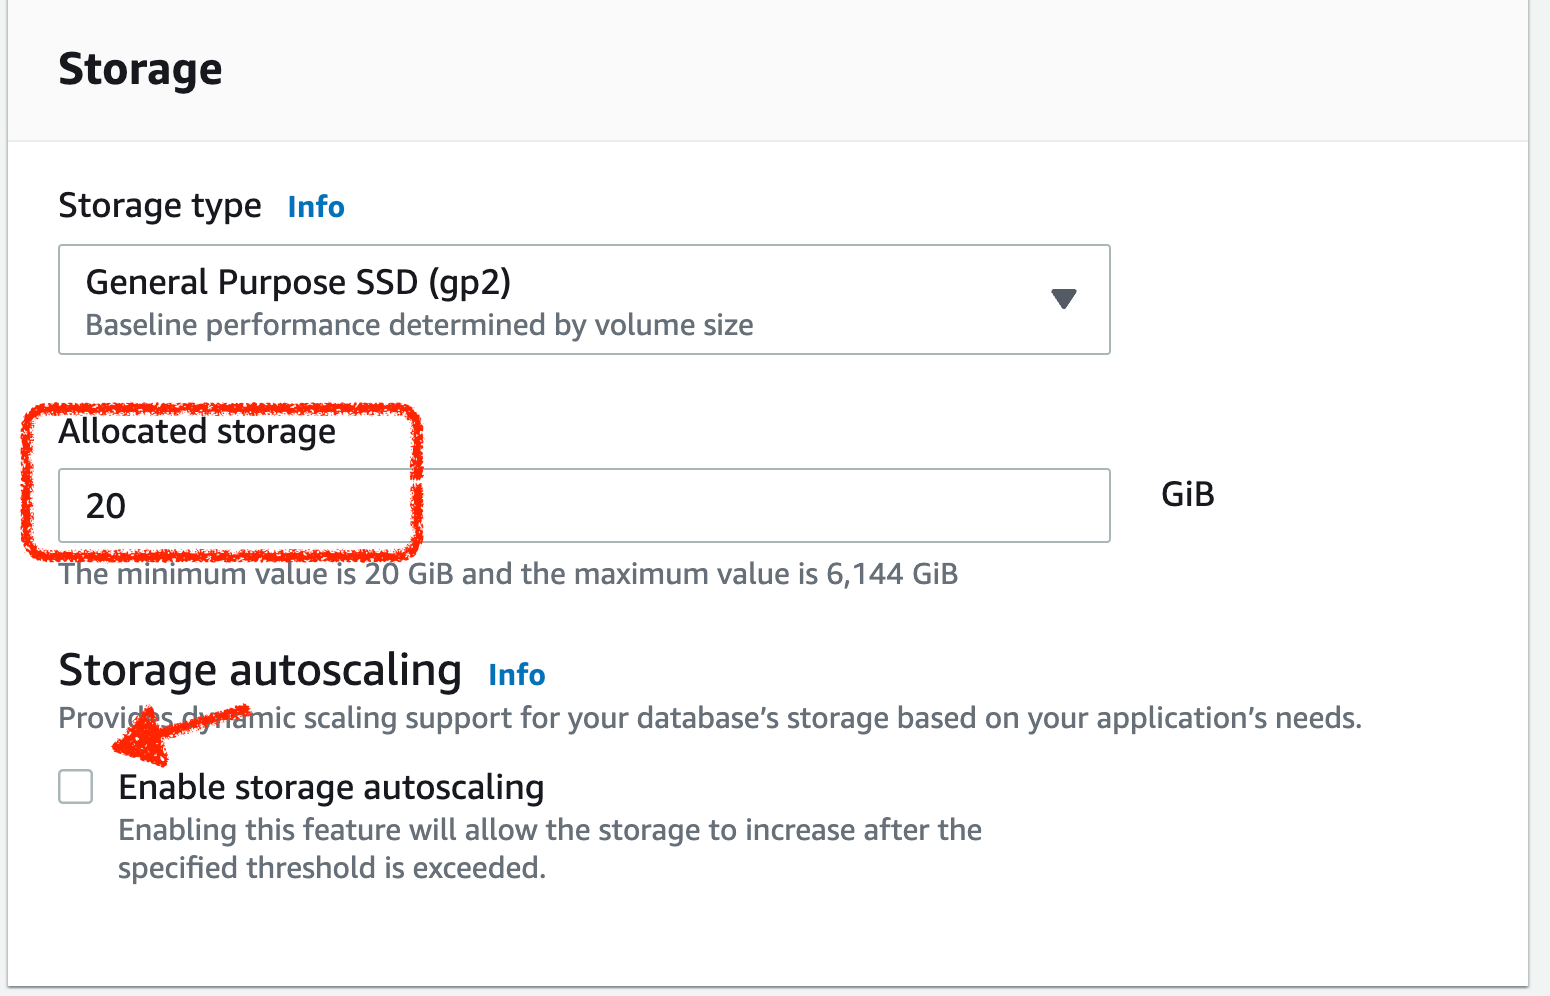
- ❗❗For "Storage":
- change "Allocated storage" to no greater than 20 GB(AWS free tier limit for database storage is 20 GB)
- Deselect "Enable storage autoscaling" to prevent database storage exceeds limit
- ❗❗ For "Connectivity", if you want to connect the database to your existing EC2 resource, then choose "Connect to an EC2 compute resource". If you choose this, AWS disables public access to database while creating, but you can check this to set up public connectivity manually after you create the database instance successfully.
If you don't need to connect it to an existing EC2 resource, choose "Don’t connect to an EC2 compute resource". If you choose this, you can change "Public access" by choosing "Yes" to have remote connectivity for database. - For "Additional configuration", deselect "Enable automated backups" because AWS free tier only offers 20 GB of backup storage(you should manually back up your database)
For other parts not mentioned, it is better to leave them alone. Then click "Create database", now you have an AWS free tier RDS database.