Troubleshoot AWS Database Remote Connectivity
Connecting to AWS database remotely, e.g. from your local computer, can be tricky sometimes, and it involves complex VPC(Virtual Private Cloud) conception, this tutorial will help you walk through the steps to set up AWS database remote connectivity without the need for understanding of VPC.
Anatomy of a VPC
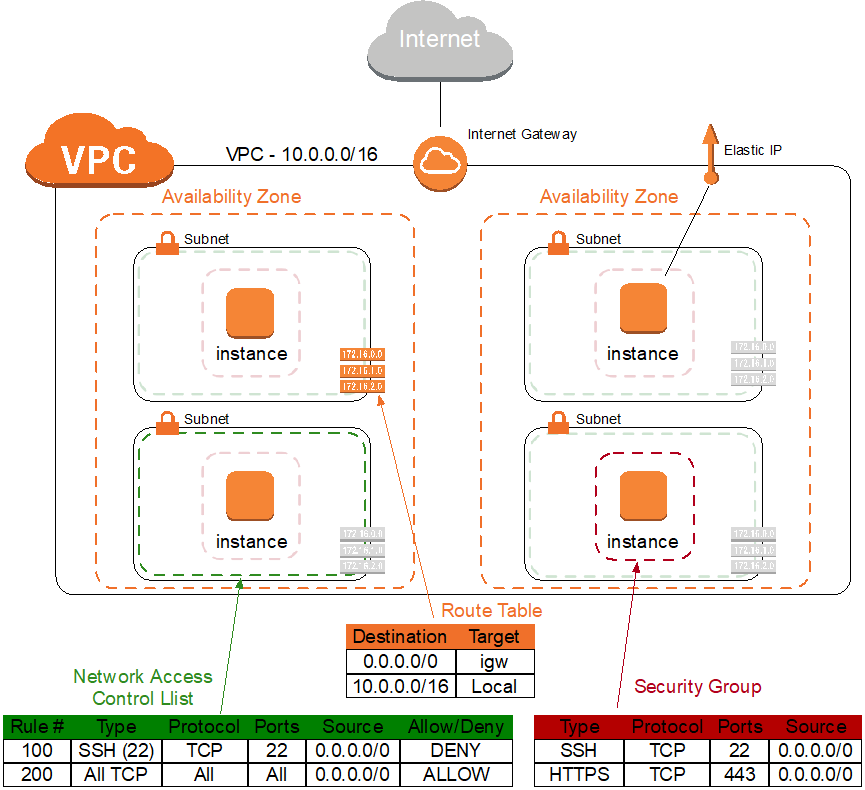
* source:
Amazon VPC for On-Premises Network Engineers – Part 1
The above picture shows the VPC structure(if you want to know more about it, read this), the instance is the database we are configuring, from inside to outside, it is surrounded by database -> security group -> subnet -> route table -> availability zone -> VPC -> internet gateway. To make sure we can reach through to the database, we need to check all the parts mentioned.
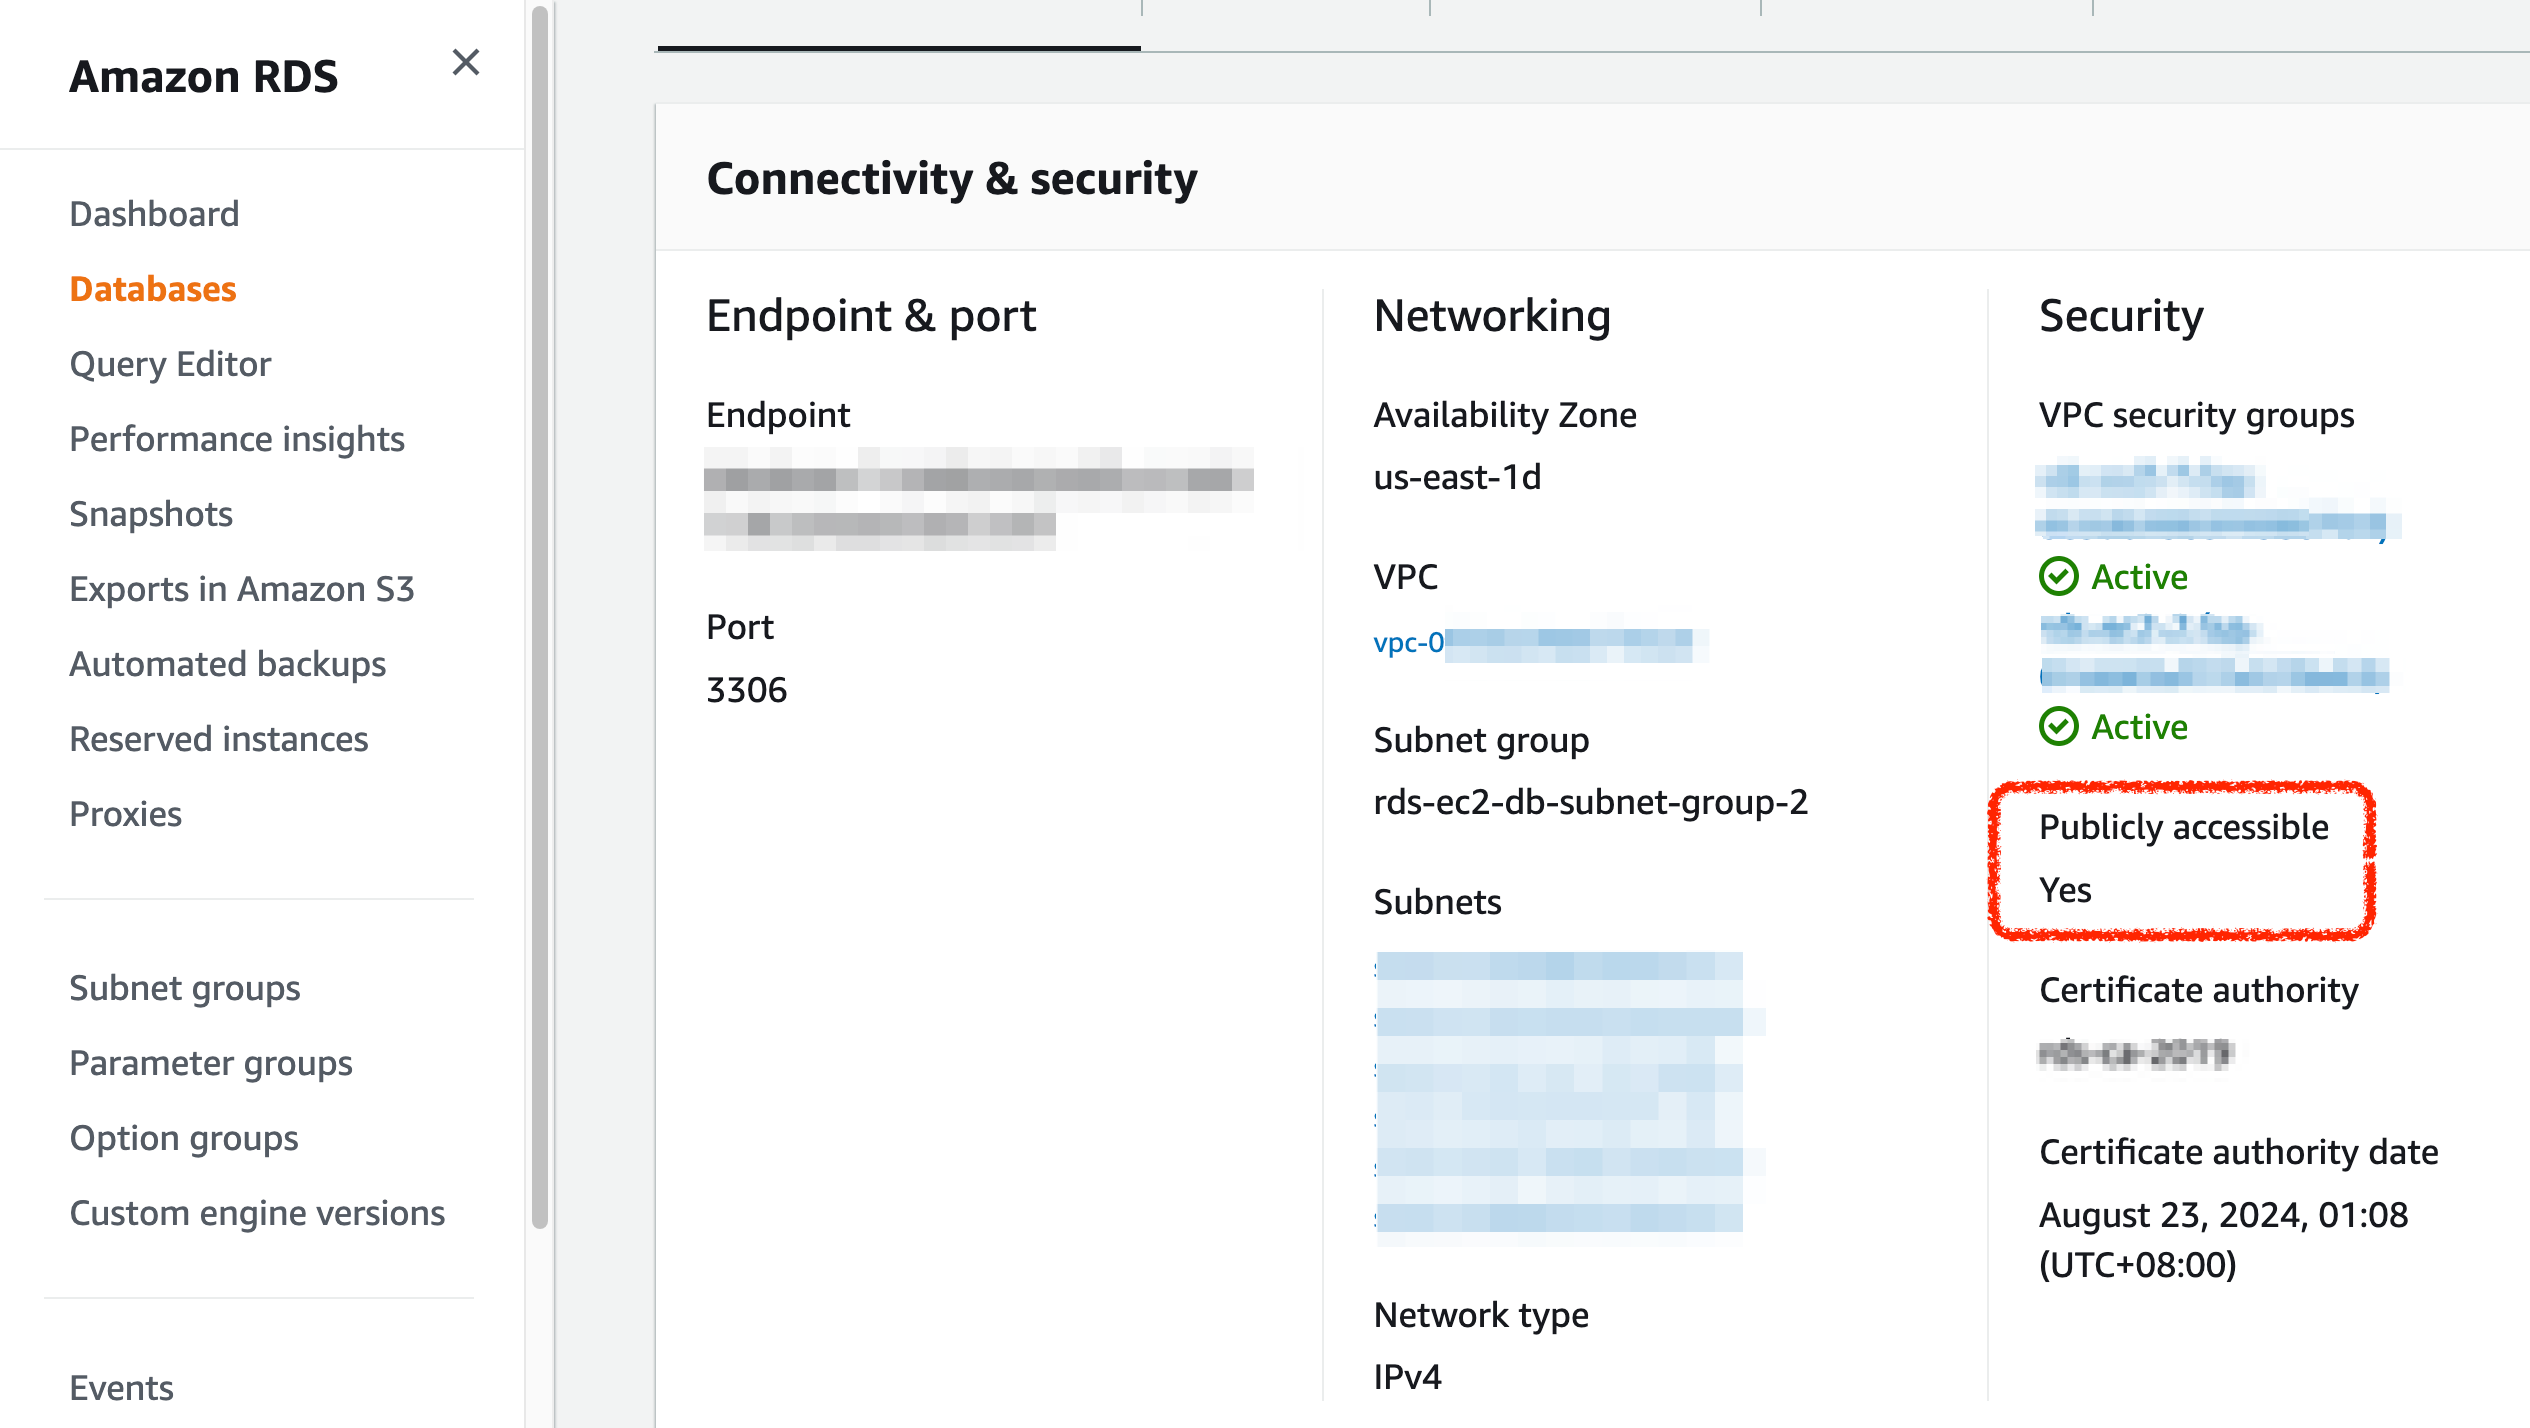
Set database "Publicly accessible"
Check if your database instance is "Publicly accessible", if not, change the Publicly Accessible property to Yes:
- Choose Modify.
- Under Connectivity, extend the Additional configuration section, and then choose Publicly accessible.
- Choose Continue.
- Choose Apply Immediately, and Modify DB Instance. It may take some time to take effect.
Assure security groups' inbound rules allow your IP

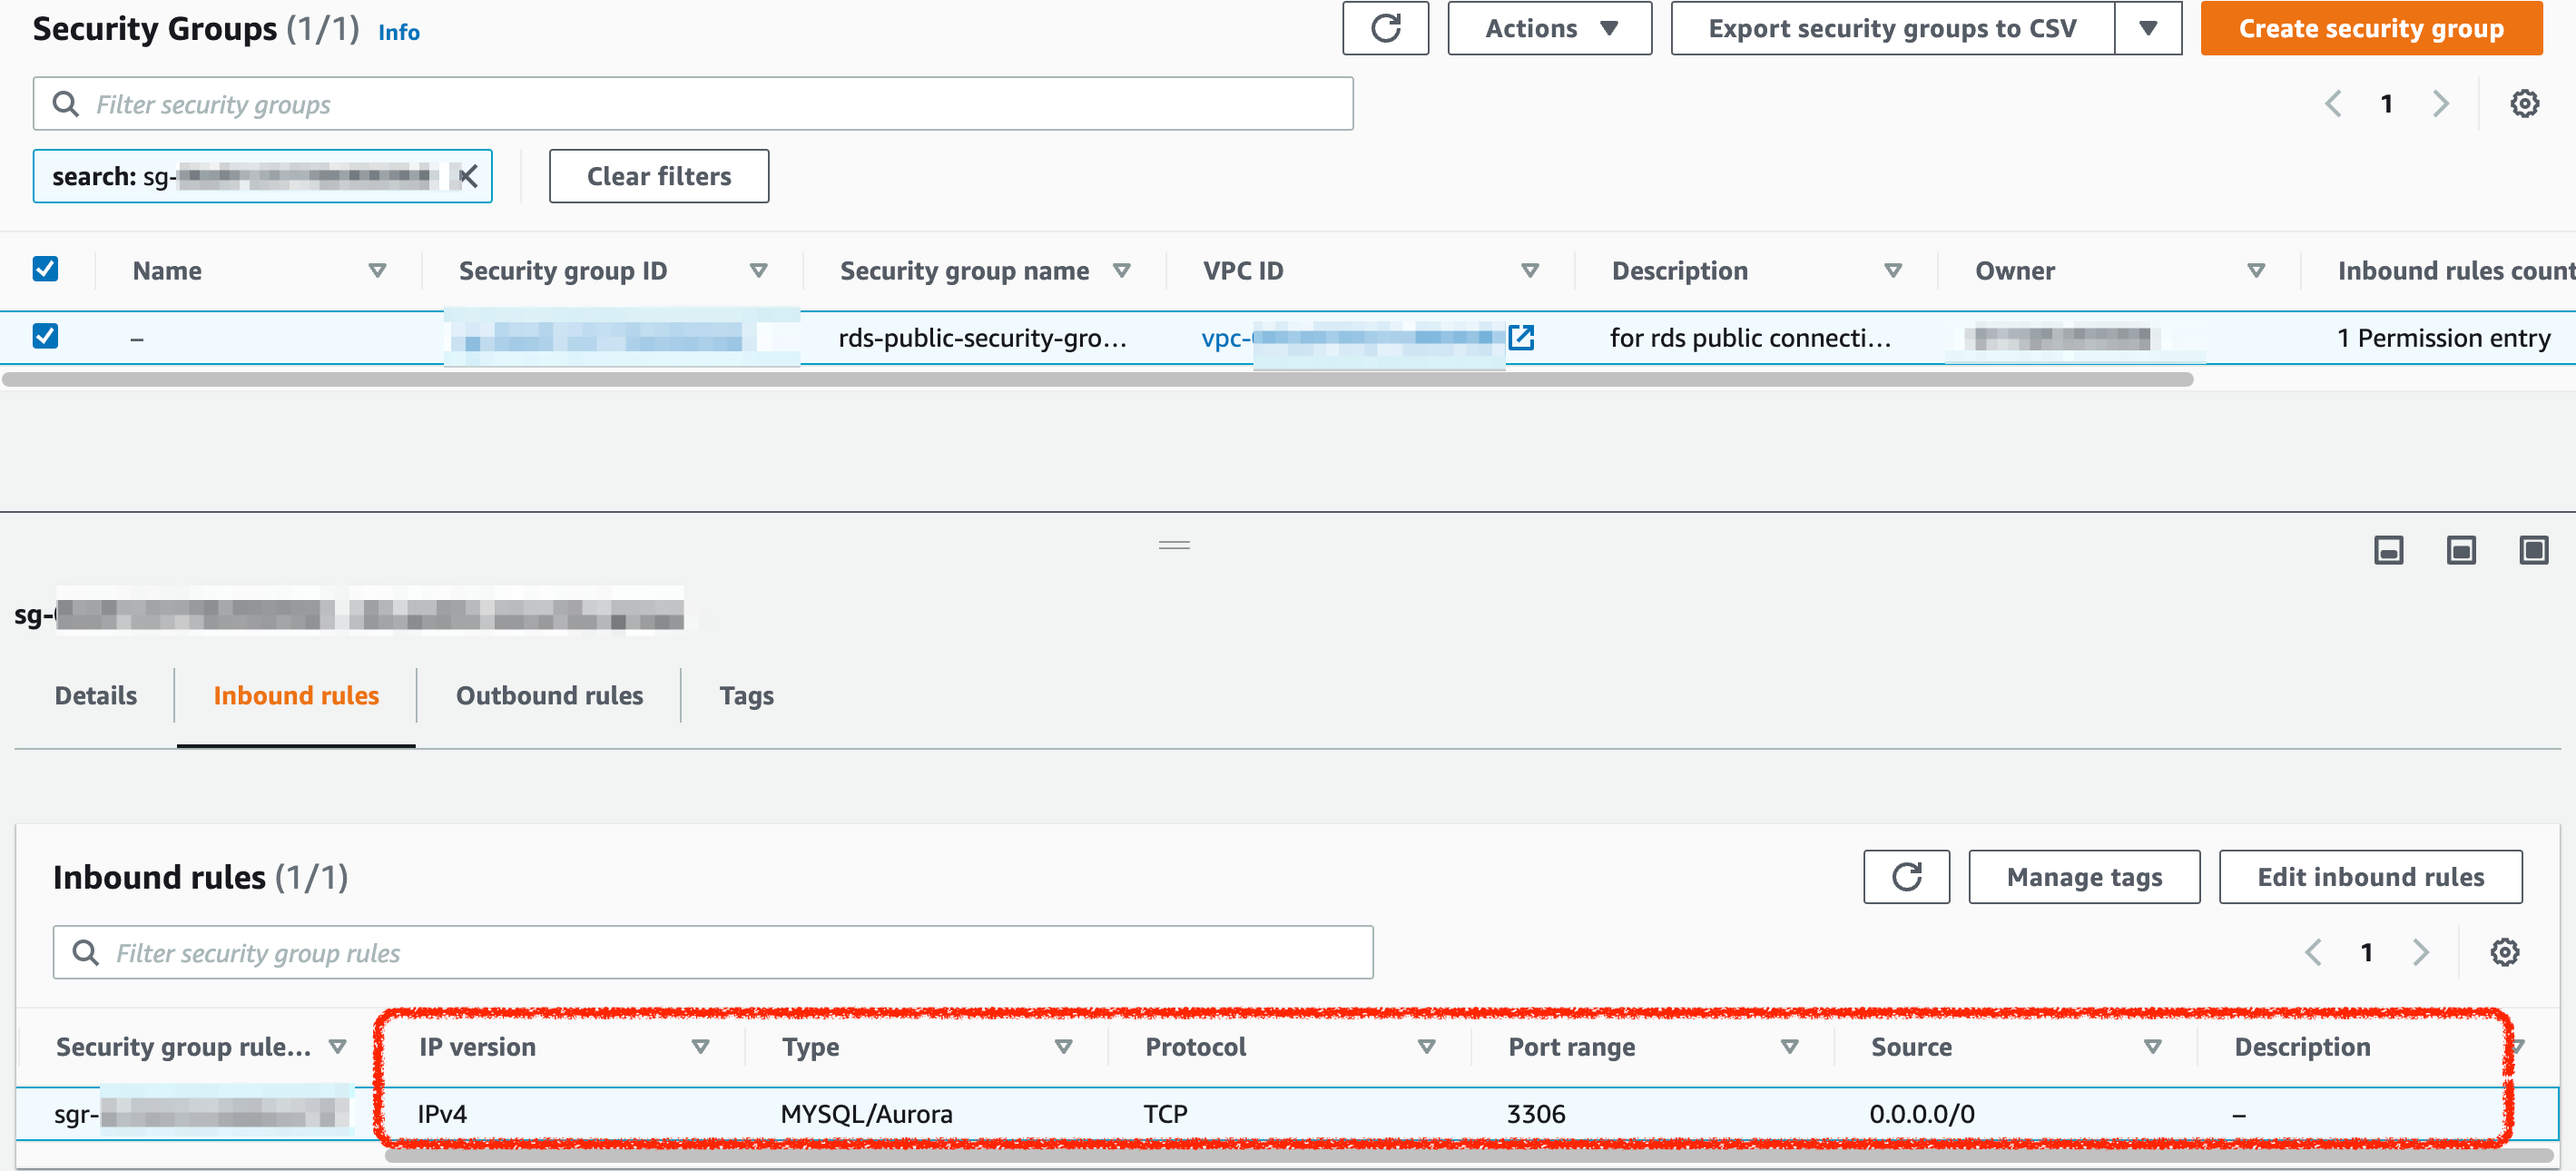
- Click the VPC security groups under "Security", and check if the "Inbound rules" include your IP address.
- If not, you can choose "Create security group" to add your IP address.(add 0.0.0.0/0 as inbound rule's source IP means allowing all public IP)
- Associate the new created security group to your database instance: choose "Modify" on database instance info page, under "Connectivity", add the new security group to Security group, and save the change.
Associate the instance with public subnets
Make sure the database instance's subnets in the availability zone is associated with public subnets. Public subnet are subnet that has a direct route to an internet gateway and resources in a public subnet can access the public internet.
-
Check the database's availability zone, you can see this on the database's "Connectivity & security". Different availability zones are associated with different subnets, knowing availability helps us know which subnet to configure.
-
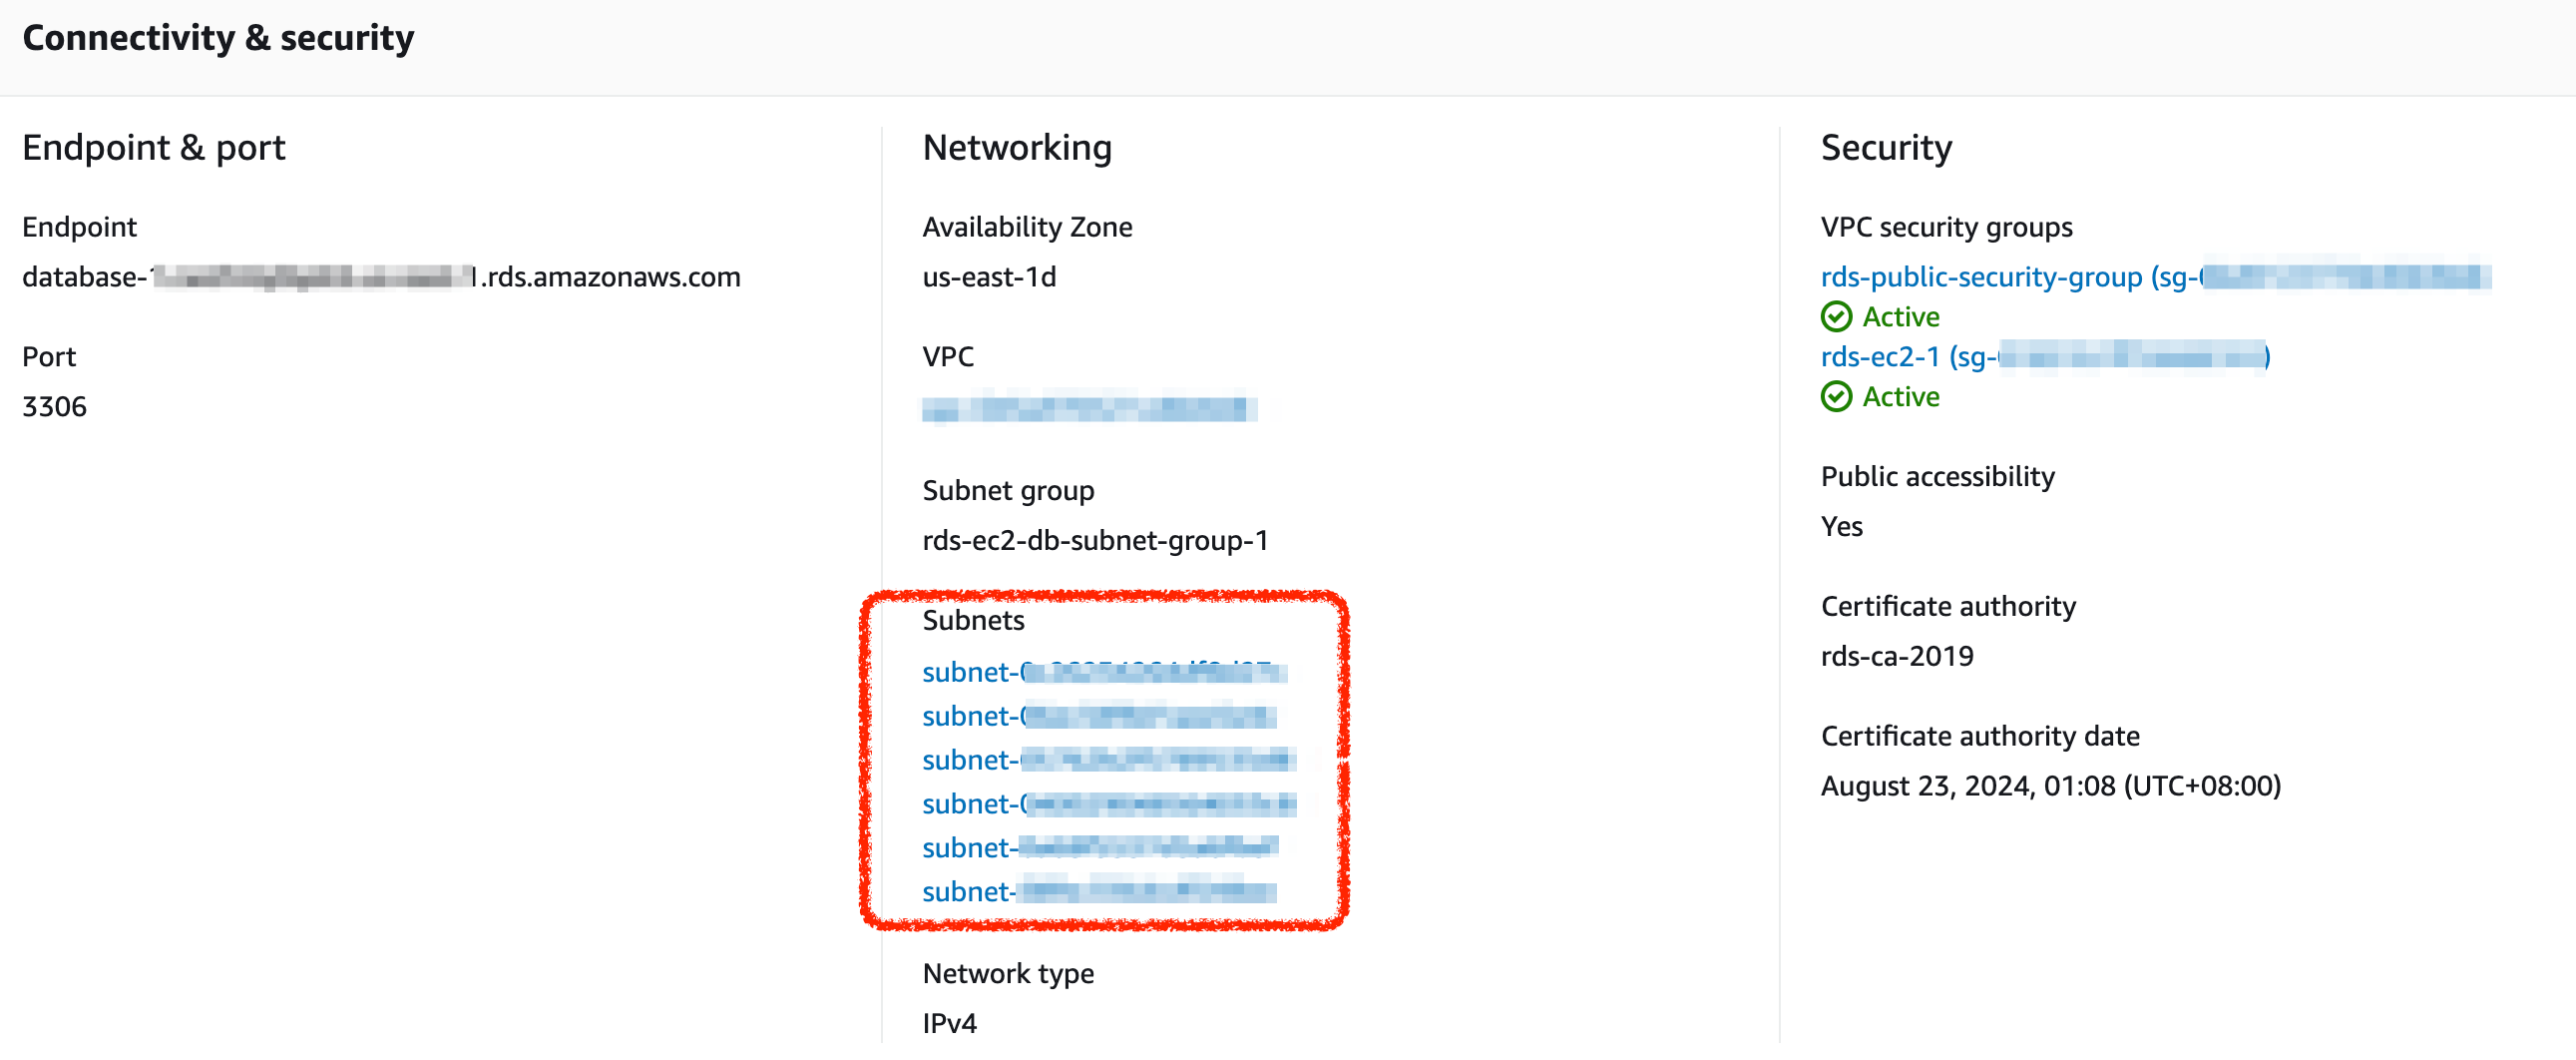
Find the subnet in the availability zone, In your AWS management console, you can see all the subnets associated with a database instance as the following image shows. Click one of them, you jumps to the subnets page, than check its availability zone.
-
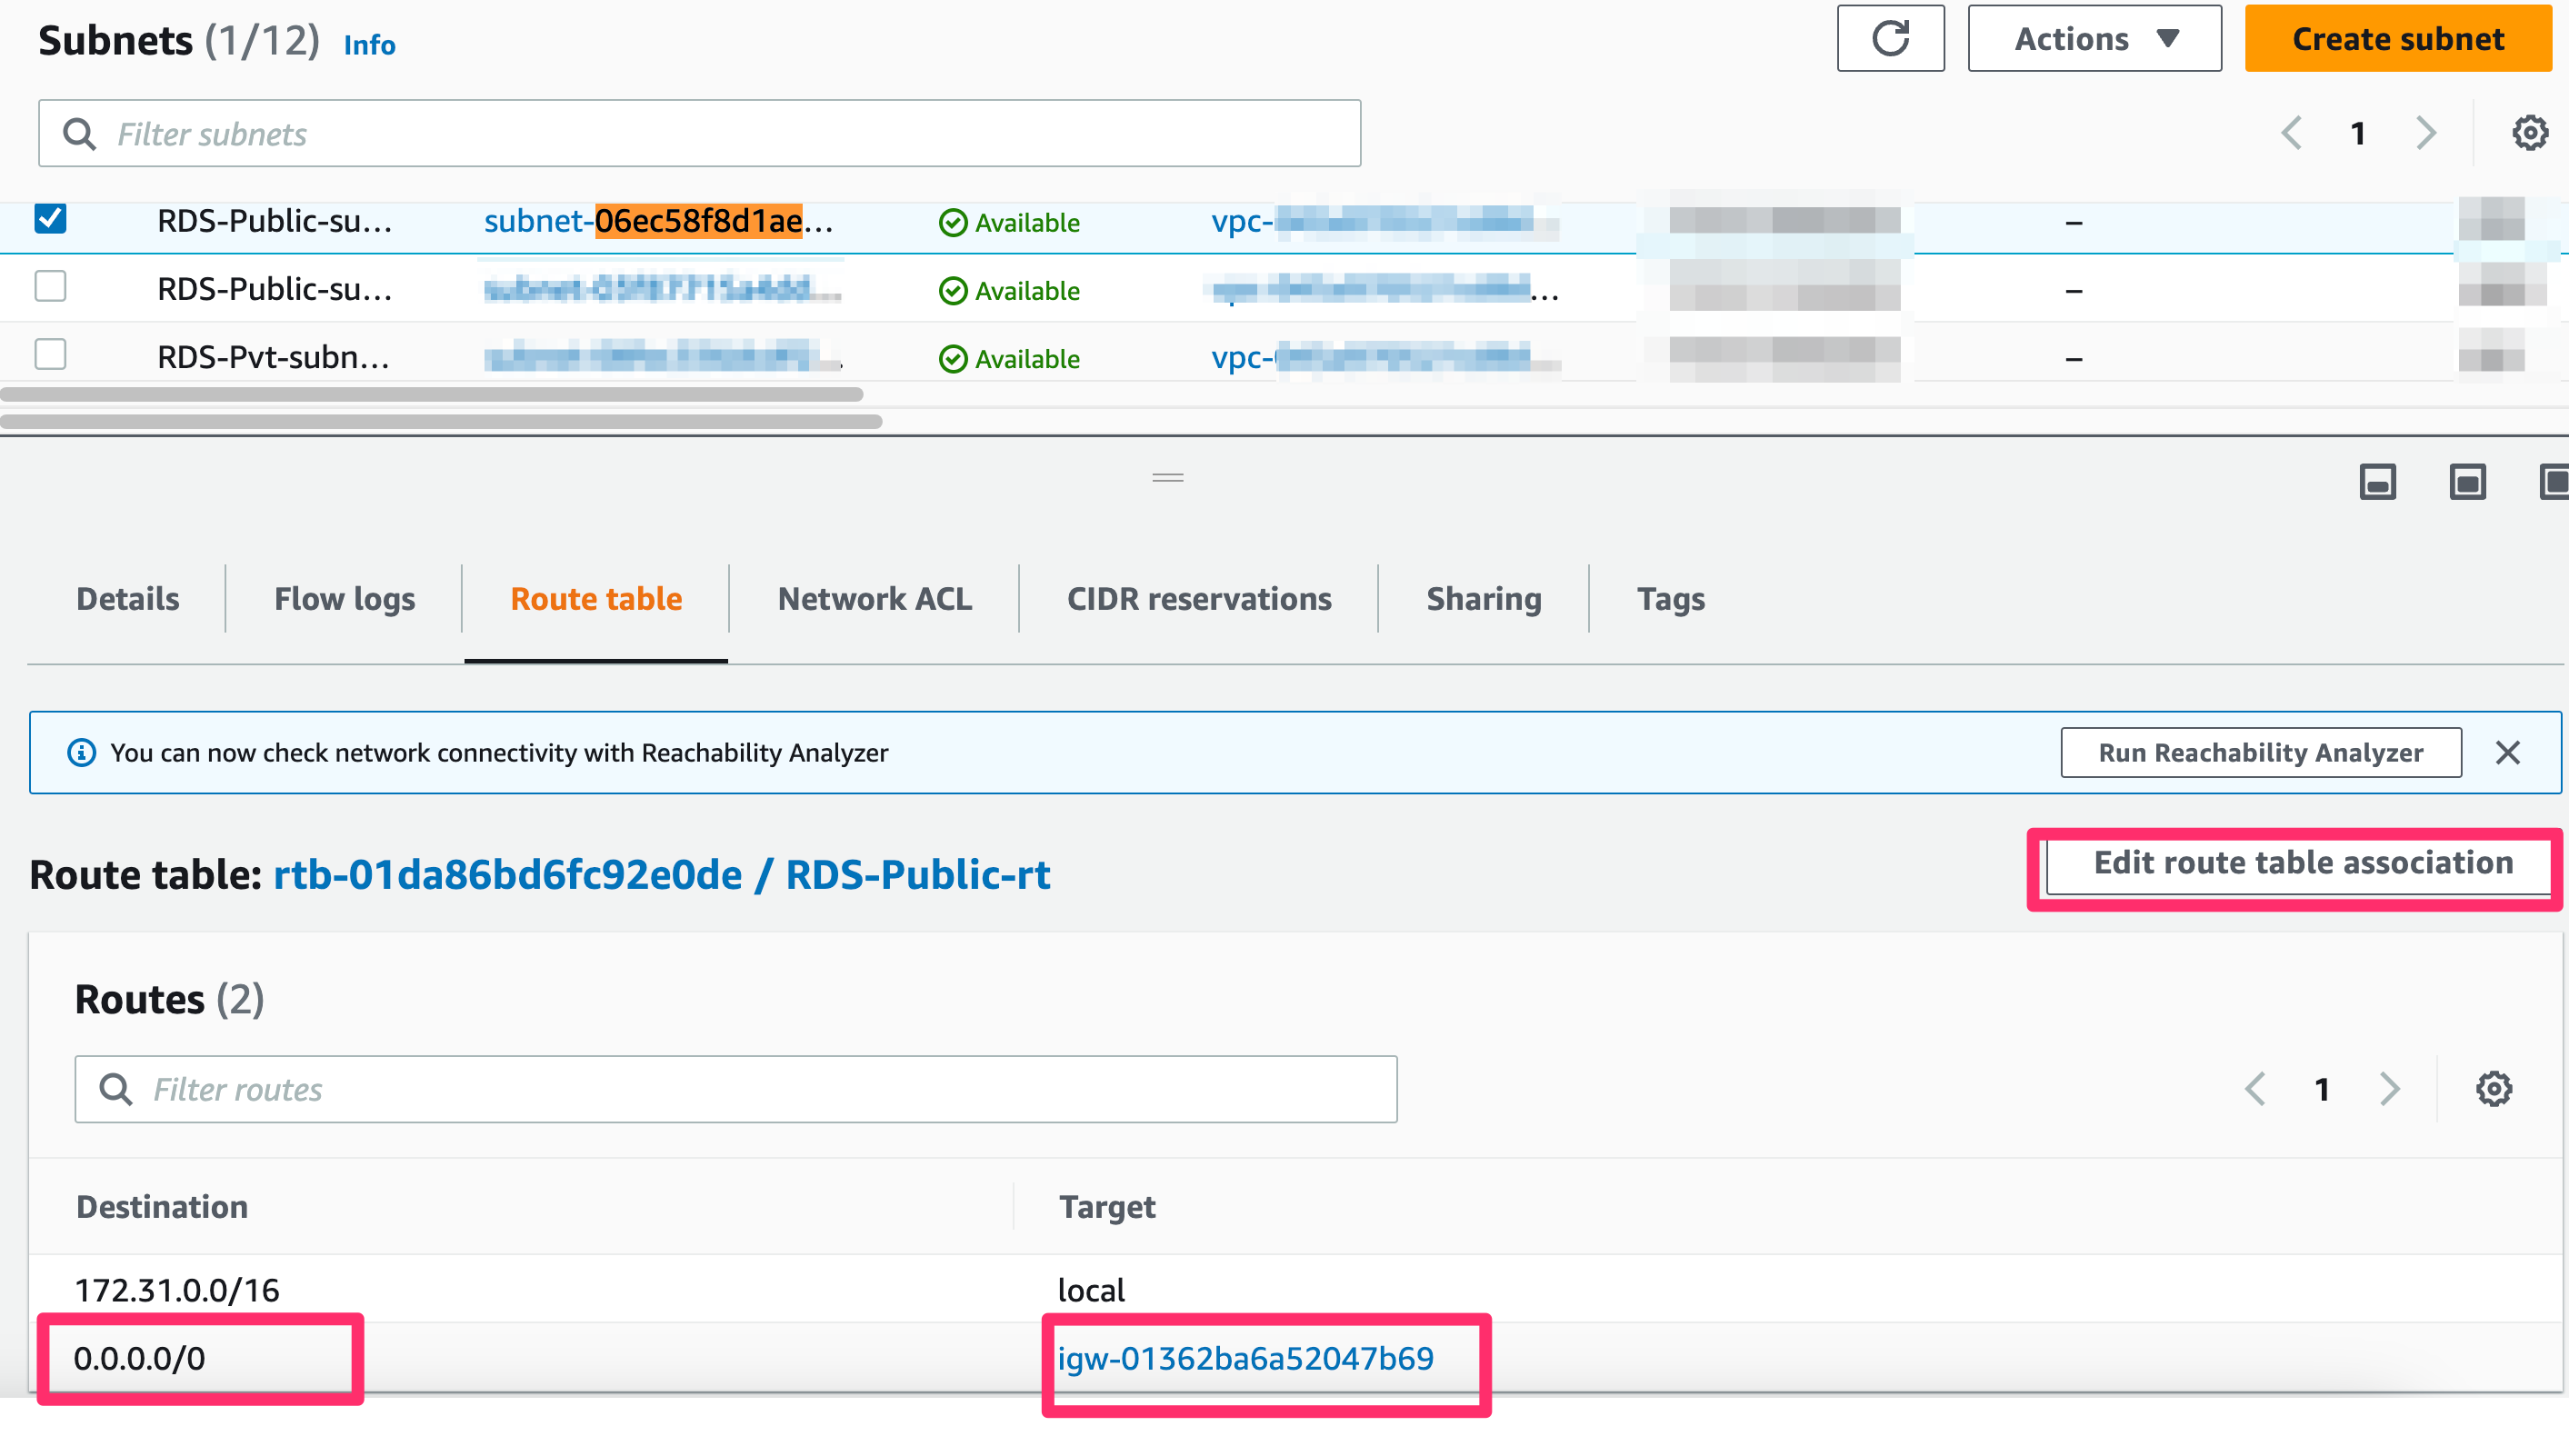
Check if the subnet is associated with a public route table: if on "Route table", you can see a route with 0.0.0.0/0 as the destination and an internet gateway as the target, then it is associated with a public route table. Otherwise, you need to change the route table association:
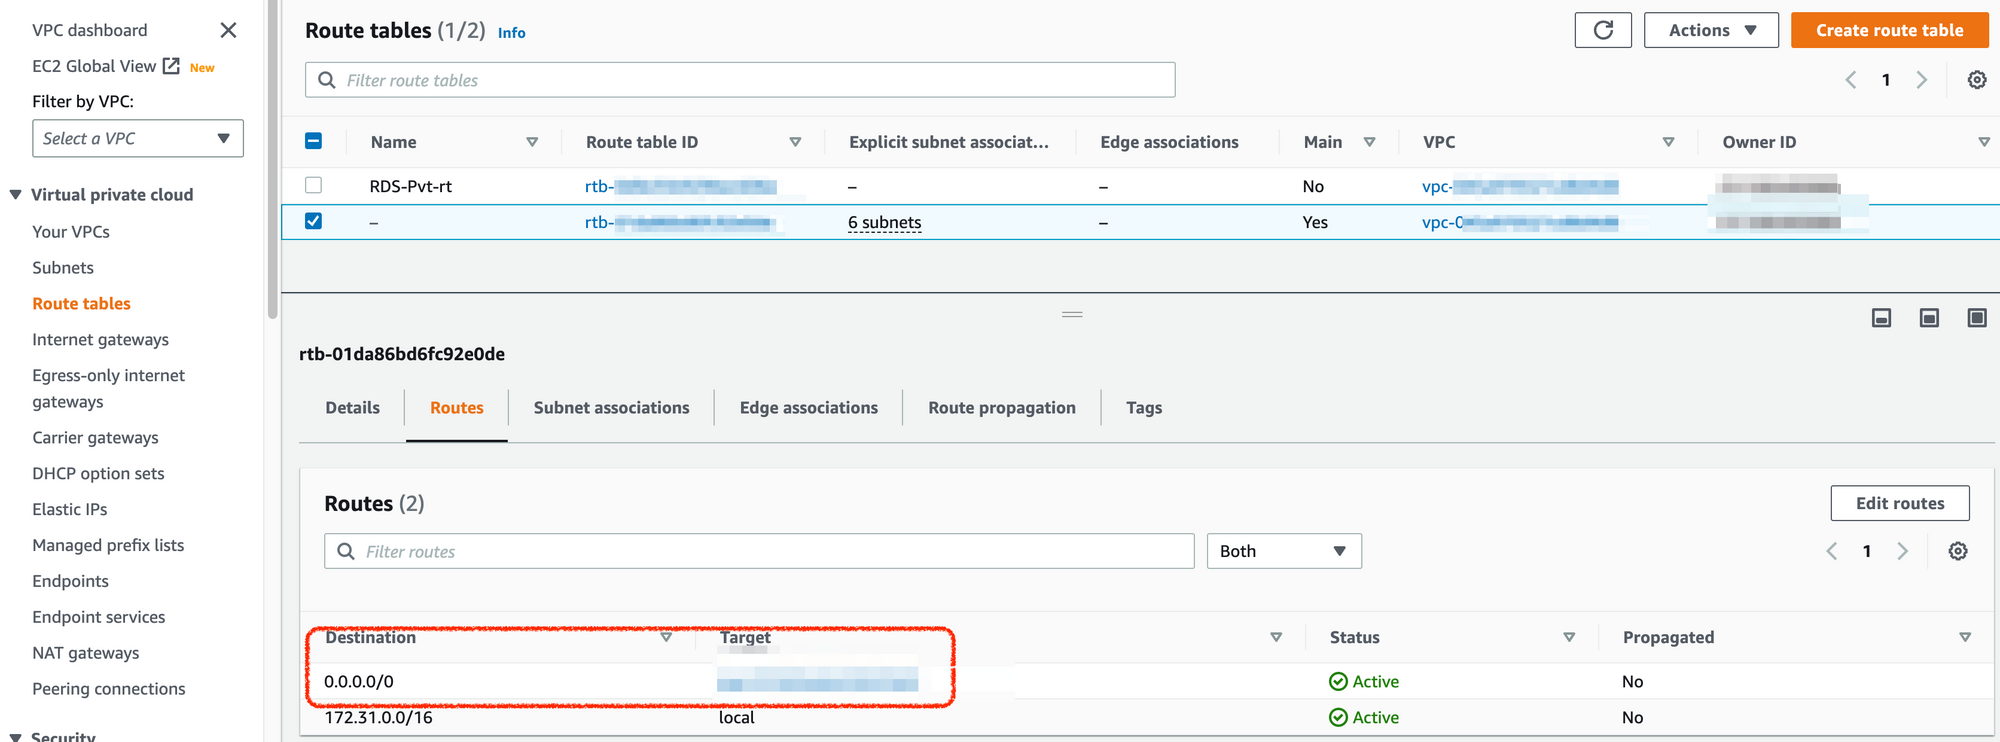
- Find the public route table. On "Route tables", find the table that has a route with 0.0.0.0/0 as the destination and the internet gateway for your VPC as the target, this is the public route table.
- Choose "Edit route table association" on subnets page and choose the public route table ID under "Route table ID" list;
- Find the public route table. On "Route tables", find the table that has a route with 0.0.0.0/0 as the destination and the internet gateway for your VPC as the target, this is the public route table.
Now, you should connect to your AWS database remotely, if you still can't connect to you database instance, please check AWS doc: Troubleshooting for Amazon RDS for more information.